Hexo 是一款生成静态站点的博客框架,写作端用 Markdown,构建后是纯 HTML/CSS/JS。Cloudflare Pages 提供免费的全球边缘分发与无限请求额度,把 Hexo 与之结合可以零成本上线一个表现优秀、HTTPS 自动签发的个人博客。本教程以 Butterfly 主题为例,覆盖从本地初始化到自动部署的完整链路。
前置依赖
- Node.js 20 LTS 或 22 LTS(Hexo 7.x 起 Node 18 不再受支持)
- Git
- 一个 GitHub 账号
- 一个托管在 Cloudflare 的域名(可选,用于绑自定义域)
第一步:初始化 Hexo 项目
全局安装 Hexo CLI:
npm install -g hexo-cli在合适的目录初始化博客:
hexo init blogcd blognpm install本地预览:
hexo s # 默认 http://localhost:4000第二步:安装 Butterfly 主题与依赖
npm install hexo-theme-butterfly --savenpm install hexo-renderer-pug hexo-renderer-stylus --savenpm install hexo-generator-searchdb --save # 站内搜索可选把根目录 _config.yml 中的 theme 字段改为 butterfly,再复制 node_modules/hexo-theme-butterfly/_config.yml 到博客根目录改名 _config.butterfly.yml 做主题级配置覆盖。
详细配置参考:
第三步:写第一篇文章
hexo new "my-first-post"打开 source/_posts/my-first-post.md 编辑正文,front-matter 字段(标题、分类、标签、封面等)参考 Butterfly 文章 front-matter。
写完后本地验证:
hexo clean && hexo g && hexo s第四步:推到 GitHub
在 GitHub 新建一个空仓库,本地:
git initgit branch -M maingit add .git commit -m "init blog"git remote add origin git@github.com:<你的用户名>/<仓库名>.gitgit push -u origin main不要把
node_modules/、public/、db.json提交进去,hexo init自带的.gitignore已经覆盖。
第五步:在 Cloudflare Pages 创建项目
登录 Cloudflare 控制台,左侧 Workers & Pages → Create → Pages → Connect to Git:
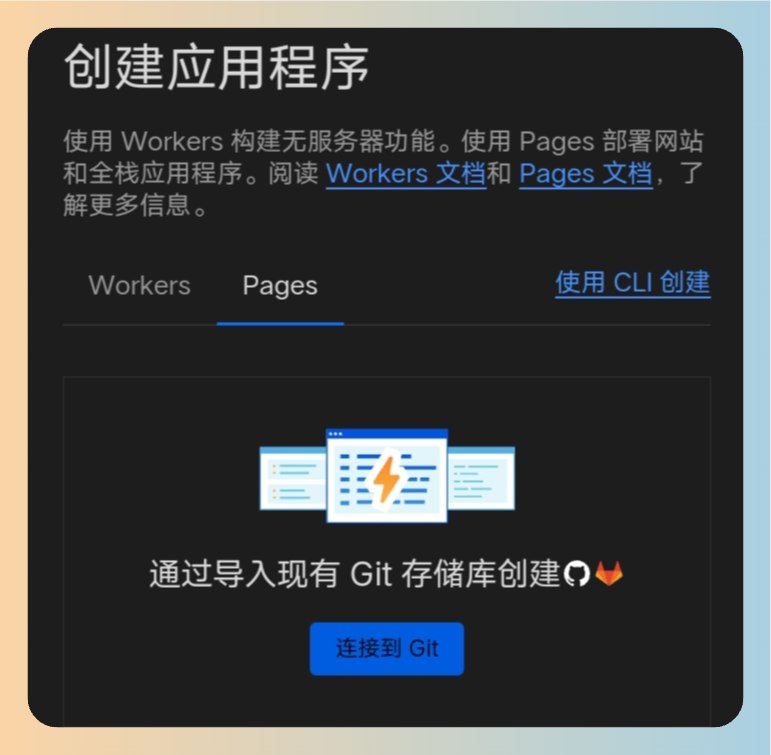
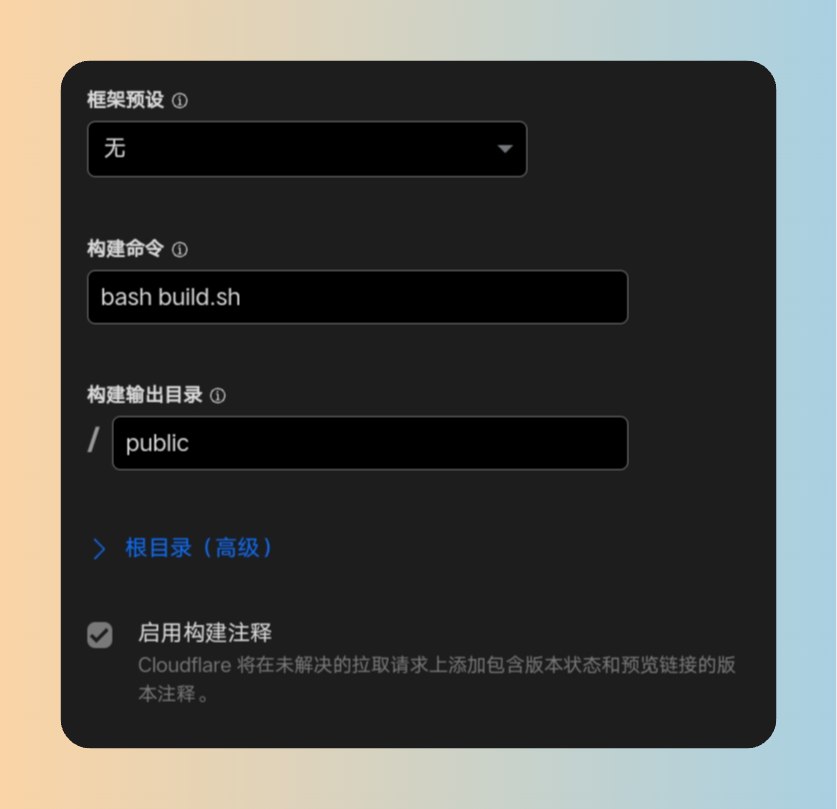
选刚才的仓库与 main 分支。Build settings 按下面填:
| 字段 | 值 |
|---|---|
| Framework preset | None |
| Build command | npm install && npm run build |
| Build output directory | public |
| Root directory | (留空) |
package.json 的 scripts 默认有 build 字段(值为 hexo generate),无需额外脚本文件。
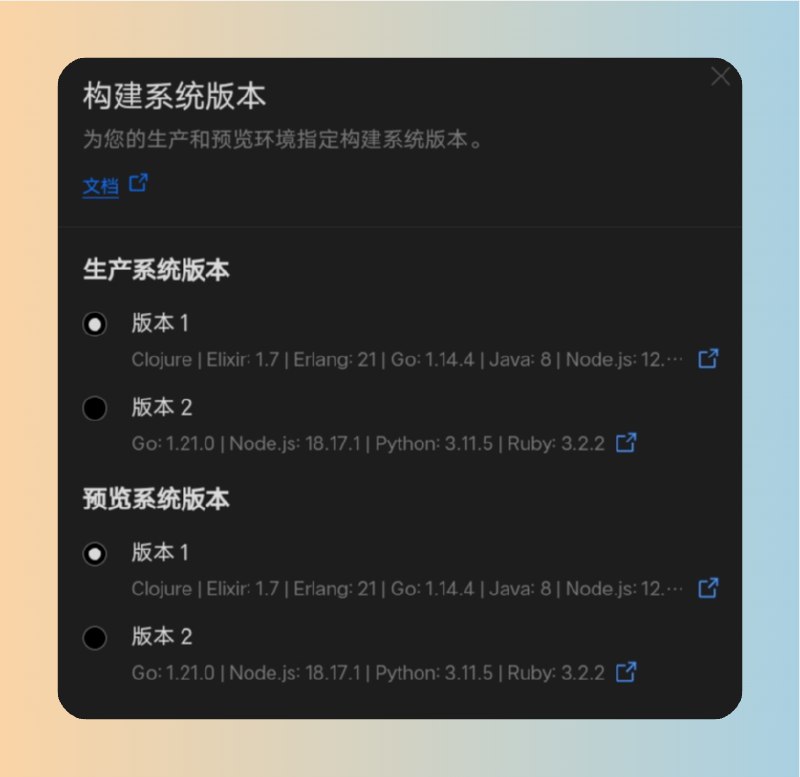
第六步:环境变量与 Node 版本
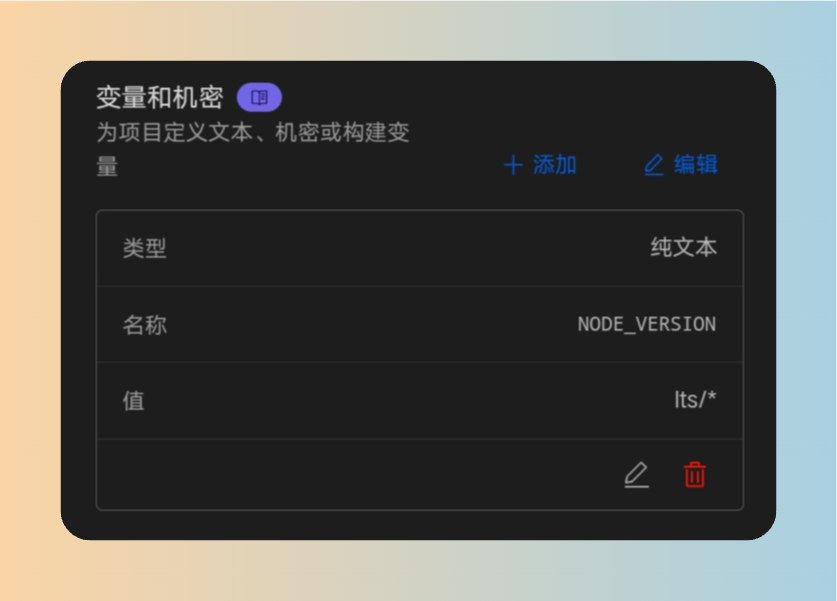
Cloudflare Pages 默认 Node 版本可能与本地不一致,编译会失败。在 Settings → Variables and Secrets 加:
| 变量名 | 值 |
|---|---|
NODE_VERSION | 22 |
或者在仓库根目录提交一个 .nvmrc 文件,内容只有一行 22,Pages 会自动识别——这样本地 nvm 也能复用。
保存后回到 Deployments,触发一次重建(Retry deployment 或推一次 commit):
第七步:自定义域名
默认会拿到一个 <project>.pages.dev 子域。绑自己域名:
- Custom domains → Set up a custom domain,输入域名
- Cloudflare 自动添加 CNAME 记录指向 Pages 项目
- HTTPS 由 CF 自动签发,无需额外操作
在 Hexo _config.yml 把 url 改成最终域名(例如 https://blog.example.com),重新部署生效。
常见问题
Error: Cannot find module 'hexo' 构建失败
package.json 的 dependencies 漏写 hexo 自身,本地能跑是因为全局装过。把 npm install -g hexo-cli 装的换成项目本地:在仓库目录跑 npm install hexo --save。
主题样式丢失
确认 _config.yml 的 theme: butterfly 与 node_modules/hexo-theme-butterfly 都已提交到仓库(node_modules 不该提交,但 _config.butterfly.yml 必须提交)。
构建超时
Pages 免费版单次构建 20 分钟上限,慢的多是首次 npm install。把锁文件 package-lock.json 提交后,Pages 会用锁文件加速安装。
Pages 部署后域名 522 / 502
通常是缓存与 DNS 传播延迟,等 1-2 分钟即可;持续异常检查 Pages 项目 Last build status。
到这一步,每次推 commit 到 main,Pages 会自动拉取、构建、上线,从写作到发布只剩 git push 一步。